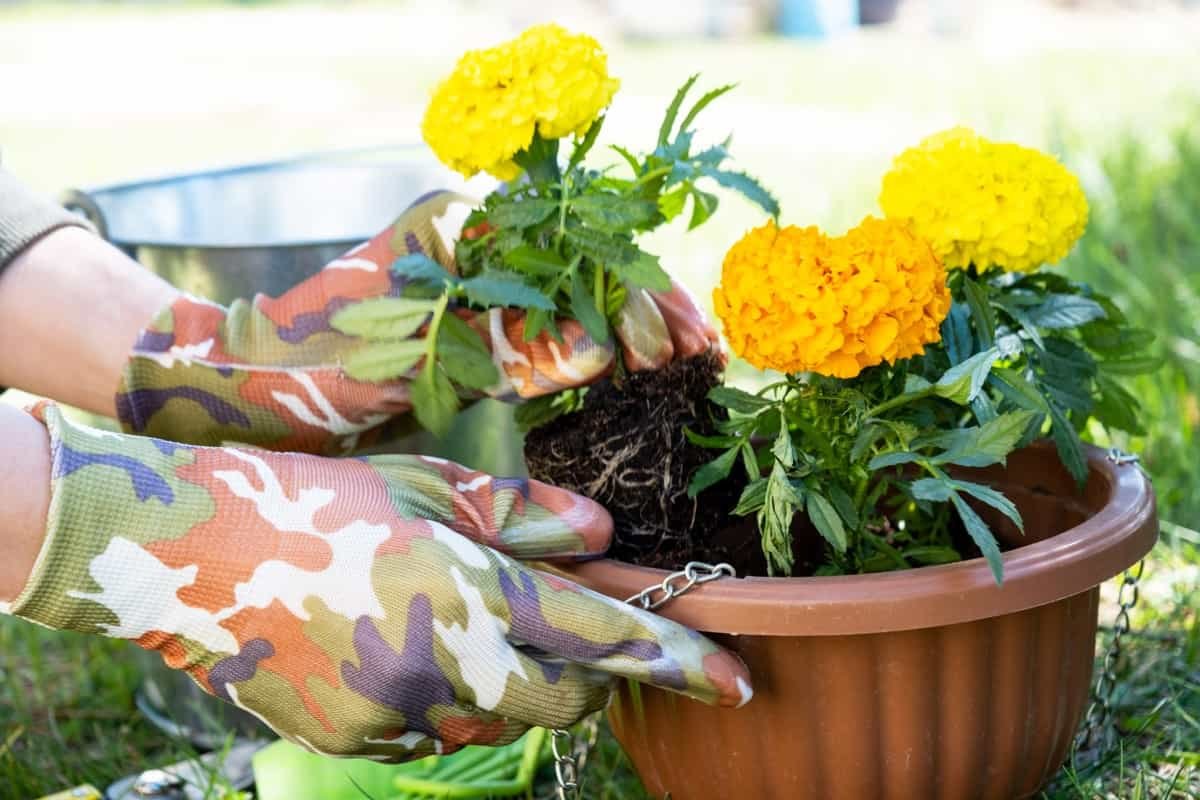
When it comes to the care of houseplants, repotting is an essential step; yet, it is not risk-free. Choosing the incorrect soil, causing damage to the roots, or incorrectly estimating the size of the pot can cause plants to become stressed, which can result in problems such as yellowing of the leaves, root rot, or stunted development.
In order to solve these issues, it is essential to immediately take action and have an awareness of the underlying cause. The purpose of this article is to provide actionable natural solutions to revive your plants, whether you are suffering with transplant shock or annoying pests. It does so by breaking down 15 typical repotting problems and providing care tips and solutions. Let’s get into how to fix houseplant repotting issues with these simple care and steps.
How to Address and Fix Houseplant Repotting Problems Effectively
Yellowing Or Wilting Leaves Following Repotting As A Result Of Transplant Shock
Transplant shock happens when the roots of a plant are disturbed, which disrupts the plant’s ability to absorb water and nutrients. In order to remedy this situation, ensure that the plant is kept in a consistent environment by avoiding direct sunshine, drafts, and variations in temperature.

In order to maintain a slightly damp soil that is never drenched, water the soil lightly. Remove leaves that have been excessively wilted in order to transfer energy to healthy growth. If you repotted the plant into a larger pot, you should make sure that the potting soil mix is appropriate for the plant’s requirements. For example, cactus require sandy soil, whereas ferns prefer materials that retain moisture.
| Aspect | Detail | Recommendation | Outcome |
|---|---|---|---|
| Light Exposure | Indirect light | Use sheer curtains | Prevents leaf burn |
| Temperature Range | 65-75°F | Avoid heaters | Stable growth |
| Watering Frequency | Every 3-4 days | Check soil moisture | Avoids overwatering |
| Soil Type | Well-draining | Add sand or perlite | Better root health |
| Humidity Level | 40-60% | Use a humidifier | Reduces leaf wilt |
| Recovery Time | 2-3 weeks | Monitor new growth | Indicates success |
Drooping or Limp Leaves During Repotting Caused by Root Disturbance
Roots are delicate, and if they are handled roughly during the repotting process, they may be damaged. During the procedure, if the leaves begin to droop, you should pause and rehydrate the root ball by soaking it in water at room temperature for ten to fifteen minutes.
Matted roots should be gently teased apart in order to stimulate new development. Utilize a chopstick or pencil to create small air gaps in the soil during the process of repotting. This will ensure that the roots are able to make good contact with the soil. To prevent the roots from being suffocated, you should avoid pressing the dirt too forcefully.
| Tool Used | Purpose | Technique | Benefit |
|---|---|---|---|
| Chopstick | Aeration | Gentle poking | Improves oxygenation |
| Water Temperature | Room temp (70°F) | Soaking 10-15 min | Rehydrates roots |
| Root Handling | Teasing apart | Use fingers lightly | Encourages growth |
| Soil Firmness | Light packing | Avoid compaction | Prevents suffocation |
| Container Size | Slightly larger | 1-2 inches wider | Reduces shock |
| Recovery Sign | Firm leaves | Check after 1 week | Shows root settling |
Excessive Leaf Drop After Repotting Due to Stress or Poor Handling
Plants that are under stress tend to shed their leaves as a means of survival. To reduce the likelihood of this happening, repot the plant during the active growing season (spring or summer) and refrain from touching the root ball unless absolutely necessary.
If the leaves fall off, you should clip them with a clean hand at the stem to avoid infection. In order to keep the plant’s moisture levels stable, you may either place it in a humid environment (like a bathroom) or use a pebble tray. When new growth appears, which is normally three to four weeks after repotting, fertilization should be avoided.
| Season | Advantage | Action | Result |
|---|---|---|---|
| Spring | Active growth | Repot early | Faster recovery |
| Humidity Source | Pebble tray | Add water below | Stable moisture |
| Pruning Tool | Clean scissors | Cut at stem base | Prevents disease |
| Growth Check | 3-4 weeks | Look for new leaves | Indicates health |
| Location | Bathroom | Natural humidity | Reduces stress |
| Fertilizer Delay | 1 month post-repot | Wait for stability | Avoids nutrient burn |
Stunted Growth Post-Repotting as a Result of Overpotting or Transplant Shock
Soil that is overpotted tends to remain wet for longer, which suffocates the roots. The plant should be repotted into a smaller container that has drainage holes if the growth stops.
Make use of a mixture that is sterile and has good drainage, such as fifty percent potting soil, thirty percent perlite, and twenty percent orchid bark. At the point where the top two inches of soil are dry, water the plant. To prevent rot from occurring in plants such as succulents or snake plants, wait one to two weeks before watering them. After the new leaves have appeared, gradually return light and fertilizer to the plant.
| Soil Component | Percentage | Function | Plant Type |
|---|---|---|---|
| Potting Soil | 50% | Nutrient base | General |
| Perlite | 30% | Aeration | Succulents |
| Orchid Bark | 20% | Drainage | Orchids |
| Watering Indicator | Top 2 inches dry | Use moisture meter | Prevents overwatering |
| Light Adjustment | Gradual increase | Move closer to window | Stimulates growth |
| Fertilizer Type | Balanced liquid | Dilute to half strength | Supports recovery |
Brown or Black Spots on Roots Indicating Root Damage or Rot
Wet, oxygen-deficient soil is ideal for the growth of root rot. Take the plant out of the ground and wash the roots in water that is lukewarm.

To remove any roots that are discolored or mushy, use shears that have been sterilized (rubber alcohol can be used to clean). For ten minutes, soak the remaining roots in a solution of hydrogen peroxide that has been diluted to a ratio of 1:10 in order to eliminate any germs. To remove poisons, repot the plant in fresh soil that has been treated with activated charcoal. Until the plant has fully recovered, water it sparingly.
| Root Condition | Sign | Treatment | Prevention |
|---|---|---|---|
| Color | Brown/black | Trim with sterilized shears | Improve drainage |
| Texture | Mushy | Remove affected parts | Avoid overwatering |
| Soaking Solution | 1:10 H2O2 | Soak for 10 min | Kills bacteria |
| Soil Additive | Activated charcoal | Mix into new soil | Absorbs toxins |
| Watering Schedule | Sparingly | Check soil dryness | Prevents recurrence |
| Recovery Sign | New root growth | Inspect after 2 weeks | Indicates health |
Soil Stays Wet Too Long After Repotting Due to Poor Drainage or Overwatering
For the majority of plants, inadequate drainage is a sentence to death. The bottom of the container should be covered with a layer of coarse gravel or broken terracotta shards, if the soil continues to retain moisture.
To enhance the aeration of the soil, incorporate perlite, pumice, or coarse sand. Make use of a peat-based mixture that also contains vermiculite while cultivating tropical plants such as peace lilies. A preventative measure against root suffocation is to always empty saucers after watering.
| Drainage Material | Type | Placement | Benefit |
|---|---|---|---|
| Gravel | Coarse | Bottom layer | Improves water flow |
| Terracotta Shards | Broken | Base of pot | Enhances drainage |
| Perlite | Lightweight | Mixed in soil | Increases aeration |
| Pumice | Volcanic | Soil amendment | Prevents compaction |
| Sand | Coarse | Top layer | Quick drying |
| Saucer Management | Empty after watering | Check after 30 min | Avoids waterlogging |
White Crust on Soil Surface Indicating Salt Buildup from Old Soil
Both hard water and excessive fertilization can lead to the accumulation of salt. The crust should be scraped off, and the soil should be thoroughly rinsed by watering it until water is completely free to flow out of the drainage holes.
The entire root ball should be submerged in water for ten minutes, and then the water should be let to drain out of the pot. For future waterings, convert to using distilled water, and fertilize at a half-strength concentration to prevent a repeat of the problem.
| Cause | Symptom | Remedy | Long-term Solution |
|---|---|---|---|
| Hard Water | White crust | Scrape off | Use distilled water |
| Overfertilization | Salt buildup | Flush soil | Half-strength fertilizer |
| Rinsing Method | Water until free flow | Use watering can | Removes excess salts |
| Submersion Time | 10 minutes | Use basin | Thorough cleansing |
| Drainage Check | Ensure holes are clear | Inspect pot | Prevents clogging |
| Frequency | Every 2-3 months | Monitor soil surface | Maintains soil health |
Roots Protruding from Drainage Holes Signaling the Plant is Root-Bound
The plants that are root-bound require prompt attention. Using your fingers or a clean knife, gently separate the root ball into its component parts.

Remove any thick, woody roots that are spreading around the pot. As you repot the plant into a container with a diameter that is two to three inches wider, be sure that the new pot is not too deep (this can cause waterlogging). A layer of fresh soil should be added to the base and sides of the plant, and a light pressing should be done to secure it.
| Root Condition | Indicator | Action | Benefit |
|---|---|---|---|
| Protruding Roots | Visible through holes | Gently separate | Relieves pressure |
| Woody Roots | Thick and circling | Trim with clean knife | Encourages new growth |
| Pot Size Increase | 2-3 inches wider | Measure diameter | Allows expansion |
| Pot Depth | Not too deep | Check plant type | Prevents waterlogging |
| Soil Layer | Fresh at base and sides | Use quality mix | Supports stability |
| Pressing Technique | Light | Use hands gently | Secures plant without compaction |
Uneven Growth After Repotting Due to Improper Placement or Soil Packing
It is common for uneven development to be caused by uneven exposure to light. Every few days, rotate the pot through a full 90 degrees to ensure that all sides receive the same amount of light.
A fork should be used to loosen the top layer of dirt, and then a thin layer of fresh soil should be added if the earth is packed too tightly. It is recommended to stake the stem of top-heavy plants such as monstera in order to promote upright development.
| Growth Issue | Cause | Solution | Outcome |
|---|---|---|---|
| Light Exposure | Uneven | Rotate pot 90° every few days | Balanced growth |
| Soil Compaction | Too tight | Loosen with fork | Improves aeration |
| Fresh Soil Addition | Thin layer | Add to top | Enhances nutrient availability |
| Staking | For top-heavy plants | Use bamboo stake | Supports upright growth |
| Plant Type | Monstera, etc. | Identify needs | Tailored care |
| Rotation Frequency | Every 3-4 days | Mark calendar | Consistent exposure |
Tiny Insects on Leaves or Soil After Repotting Due to Contaminated Soil or Pots
In conditions that are moist and stagnant, fungus gnats and spider mites are able to flourish. To prevent the spread of pests, the plant should be isolated.
Bacillus thuringiensis israelensis (BTI) dunks should be applied to the soil in order to control gnats. Neem oil solution, consisting of one teaspoon of oil and one liter of water, should be used to wipe down leaves in order to eliminate mites. It is important to prevent overwatering and to replace the top two inches of soil.
| Pest Type | Sign | Treatment | Prevention |
|---|---|---|---|
| Fungus Gnats | Small flies | BTI dunks | Avoid overwatering |
| Spider Mites | Webbing on leaves | Neem oil solution | Regular leaf wiping |
| Isolation | Separate from others | Move to different room | Stops spread |
| Soil Replacement | Top 2 inches | Use fresh mix | Removes eggs |
| Watering Control | Check soil dryness | Use moisture meter | Reduces pest habitat |
| Application Frequency | Weekly | Monitor for pests | Maintains control |
Exposed Roots on One Side of the Pot Indicating Uneven Soil Packing
Exposed roots soon dry up, which puts the plant at danger of injury. They should be covered with fresh soil, but the stem should not be buried excessively deeply.
When working the soil around the roots, use a chopstick to do it in a gentle manner so as not to compact it. The soil should be watered lightly to help it settle, and a layer of mulch, such as sphagnum moss, should be added to help it retain moisture. If you want to grow plants like orchids, you should use bark chips rather than earth.
| Root Exposure | Risk | Correction | Additional Care |
|---|---|---|---|
| Drying Out | Dehydration | Cover with fresh soil | Prevents damage |
| Stem Burial | Not too deep | Check plant base | Avoids rot |
| Soil Working Tool | Chopstick | Gentle maneuvering | Avoids compaction |
| Watering After | Light | Use spray bottle | Helps settling |
| Mulch Type | Sphagnum moss | Top layer | Retains moisture |
| Alternative for Orchids | Bark chips | Use instead of soil | Better aeration |
Foul Smell from the Soil Indicating Root Rot or Anaerobic Conditions
In soil that is saturated with water, anaerobic microorganisms flourish. Taking the plant out of the ground and washing the roots under running water will help remove any debris.

Remove any roots that have become dirty or stinky. To increase the number of helpful microbes, repot the plant in fresh soil that has been mixed with perlite and a handful of worm castings. Place the plant in a place that has enough ventilation, and water it only when the soil is almost completely dry.
| Odor Source | Likely Cause | Immediate Action | Long-term Fix |
|---|---|---|---|
| Root Rot | Overwatering | Remove plant, wash roots | Improve drainage |
| Anaerobic Conditions | Poor aeration | Trim affected roots | Add perlite to soil |
| Soil Amendment | Worm castings | Mix into new soil | Boosts beneficial microbes |
| Ventilation | Good airflow | Place near fan | Reduces humidity |
| Watering Schedule | When nearly dry | Check with finger | Prevents recurrence |
| Recovery Sign | New growth | Monitor for 2 weeks | Indicates health |
Dry Soil Despite Regular Watering Due to Improper Soil Mix or Overpotting
Dry soil is frequently the result of hydrophobic soil, which is typically seen in older mixes. The soil should be allowed to absorb moisture from the bottom up while the pot is soaked in a water bath for fifteen to twenty minutes.
Use a granular mixture that contains fifty percent perlite for succulents and cacti. In the event that the problem is caused by overpotting, repot the plant into a smaller container and water it thoroughly until the water runs out of the bottom.
| Soil Issue | Symptom | Solution | Plant-Specific Care |
|---|---|---|---|
| Hydrophobic Soil | Water repellent | Bottom watering | Ensures absorption |
| Overpotting | Large pot, small plant | Repot to smaller container | Reduces water retention |
| Soil Mix for Succulents | 50% perlite | Use granular mix | Improves drainage |
| Watering Technique | Until water runs out | Use watering can | Thorough hydration |
| Pot Size Adjustment | Snug fit | Measure root ball | Better moisture control |
| Frequency Check | Weekly | Adjust as needed | Maintains balance |
Plant Leaning or Falling Over After Repotting Due to Lack of Proper Support
Vining plants, such as pothos, are known to lean somewhat frequently. It is recommended to place a bamboo stick or a moss pole inside the container, and then use soft plant ties to secure the stem.
Rocks should be placed at the bottom of the container to add weight to the plant if it is top-heavy. Rotating the pot once a week is recommended for trailing plants in order to promote balanced development.
| Support Type | Use For | Installation | Additional Benefit |
|---|---|---|---|
| Bamboo Stick | Vining plants | Insert into soil | Guides growth |
| Moss Pole | Climbing plants | Secure with ties | Encourages vertical growth |
| Plant Ties | Soft | Wrap around stem | Prevents damage |
| Rocks | Bottom of pot | Add before soil | Increases stability |
| Rotation Frequency | Weekly | Turn 90° | Even light distribution |
| Plant Example | Pothos | Trailing vines | Balanced appearance |
Slow Recovery After Repotting Due to Incorrect Pot Material or Size
In contrast to plastic containers, clay pots are able to wick moisture, making them an excellent choice for plants such as lavender. In the event that the material of the pot is not appropriate, repot the plant into a container that is more appropriate.

Pruning dead leaves, providing mild airflow, and using a dilute seaweed extract solution to stimulate root growth are all things that may be done to slow down the recovery process. Before the plant has new leaves, you should refrain from moving it.
| Pot Material | Property | Best For | Adjustment |
|---|---|---|---|
| Clay | Wicks moisture | Lavender, succulents | Use for dry-loving plants |
| Plastic | Retains moisture | Ferns, tropicals | Use for moisture lovers |
| Pruning | Dead leaves | Use clean scissors | Redirects energy |
| Airflow | Mild | Place near open window | Reduces stress |
| Seaweed Extract | Dilute solution | Apply to soil | Stimulates roots |
| Movement Restriction | Until new growth | Keep in place | Allows stabilization |
Conclusion
The process of repotting plants might be difficult, but if you are patient and use the appropriate strategies, your plants can recover and become even more robust. Remember that the best tools you have at your disposal are careful handling, the right soil, and attentive maintenance.
These solutions will assist your houseplants in thriving, whether you are addressing the issue of root rot or fighting off pests. Happy repotting to you!


Leave a Reply